Getting Started
This guide shows how to build a simple chat application using Tarobase on the back-end. A follow-up to this quickstart will show how you can convert your app to store messages on-chain and require a fee for any messages sent to the chat room - without further front-end changes needed.
Step 1: Set Up your Tarobase App in the Console
To start building the chatroom application, you first need to create an app on the Tarobase Console, and configure a Tarobase Policy for your new app. A Tarobase Policy is the backbone to a Tarobase application, it is a JSON structure that is used to define rules for how your app works both on-chain and off-chain.
-
Go to the Tarobase console's Create App page. Give your new app a name such as
ChatRoom. Keep the default chain asBase Testnetand authentication asWeb3-Onboard- we use this because it integrates with Coinbase Smart Wallet, which means users won't have to pay transaction fees for this app. ClickCreate App.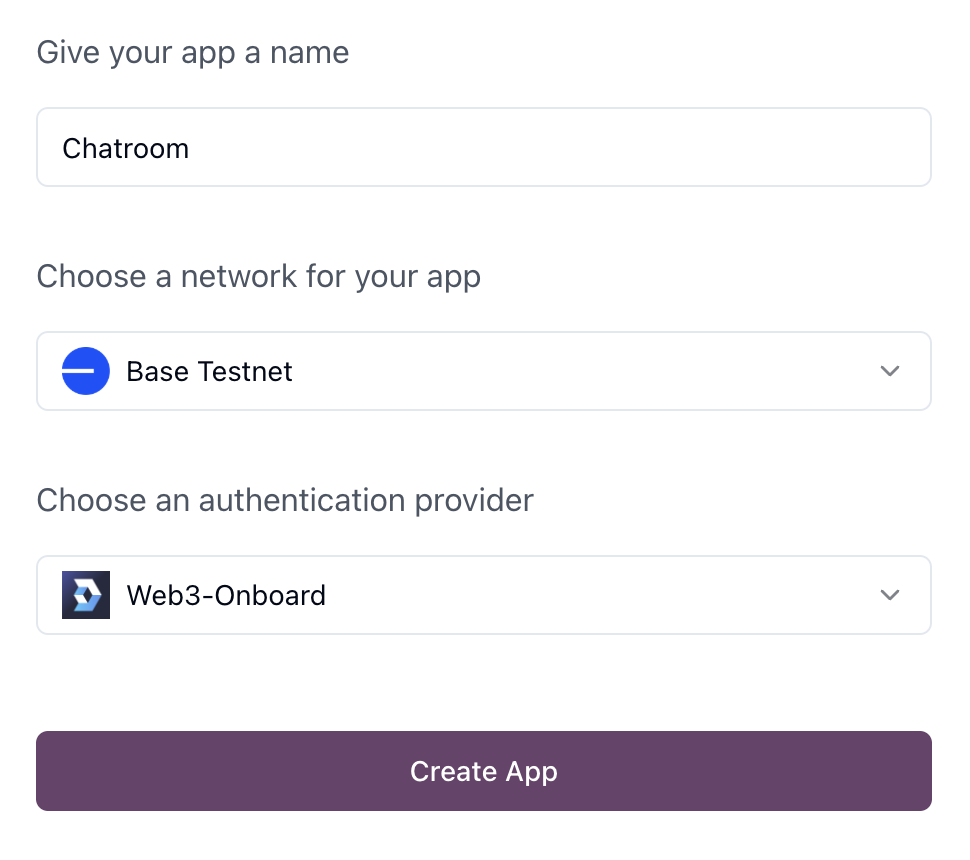
-
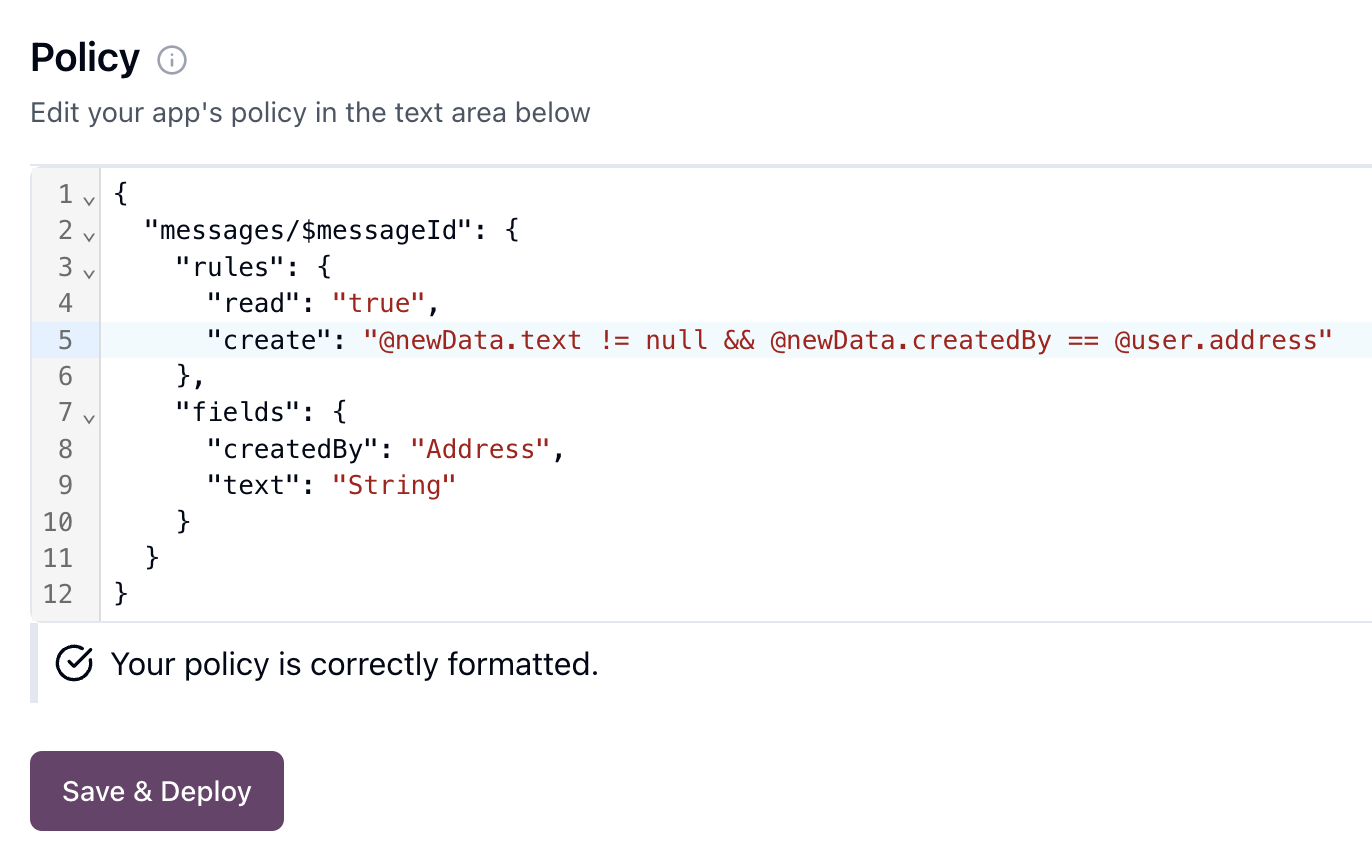
You should be redirected to the
Project Detailspage with your new app, navigate to the Policy section replace the existing policy with the following:
{
  "messages/$messageId": {
    "rules": {
      "read": "true",
      "create": "@newData.createdBy == @user.address"
    },
    "fields": {
      "createdBy": "Address",
      "text": "String"
    }
  }
}
This policy defines a messages collection, which can contain message documents with the fields createdBy and text. The messages collection allows anyone to read all messages, and allows users to create new messages on behalf of themselves.
The policy is currently set for off-chain storage (which is the default when onchain isn't specified). In the follow-up guide, we'll modify this policy to enable on-chain storage.
-
Click Save & Deploy
-
Congratulations! You've successfully deployed your first Tarobase backend app. Now let's build a frontend to interact with it.
Step 2: Initialize a React Project
You can use any TypeScript or JavaScript framework to build with Tarobase. Here we'll use Create React App to create a React app in JavaScript.
Before starting, make sure you have Node.js version 18 or higher and npm (Node Package Manager) installed on your system. If you don't have them installed, you can download and install them from nodejs.org.
- Open a terminal and run the following
npm create vite@latest my-chat-app -- --template react
cd my-chat-app
- Install the Tarobase SDK to help interact with Tarobase:
npm install
npm install --save @tarobase/js-sdk
- Start the development server:
npm run dev
Your browser should be opened up to http://localhost:5173/ with the default React app open.
Step 3: Implement Authentication and Messaging
-
Back on the Tarobase Console, locate and keep handy your
App IDfrom theProject Detailspage, which will be used to reference your Tarobase app from your front-end code.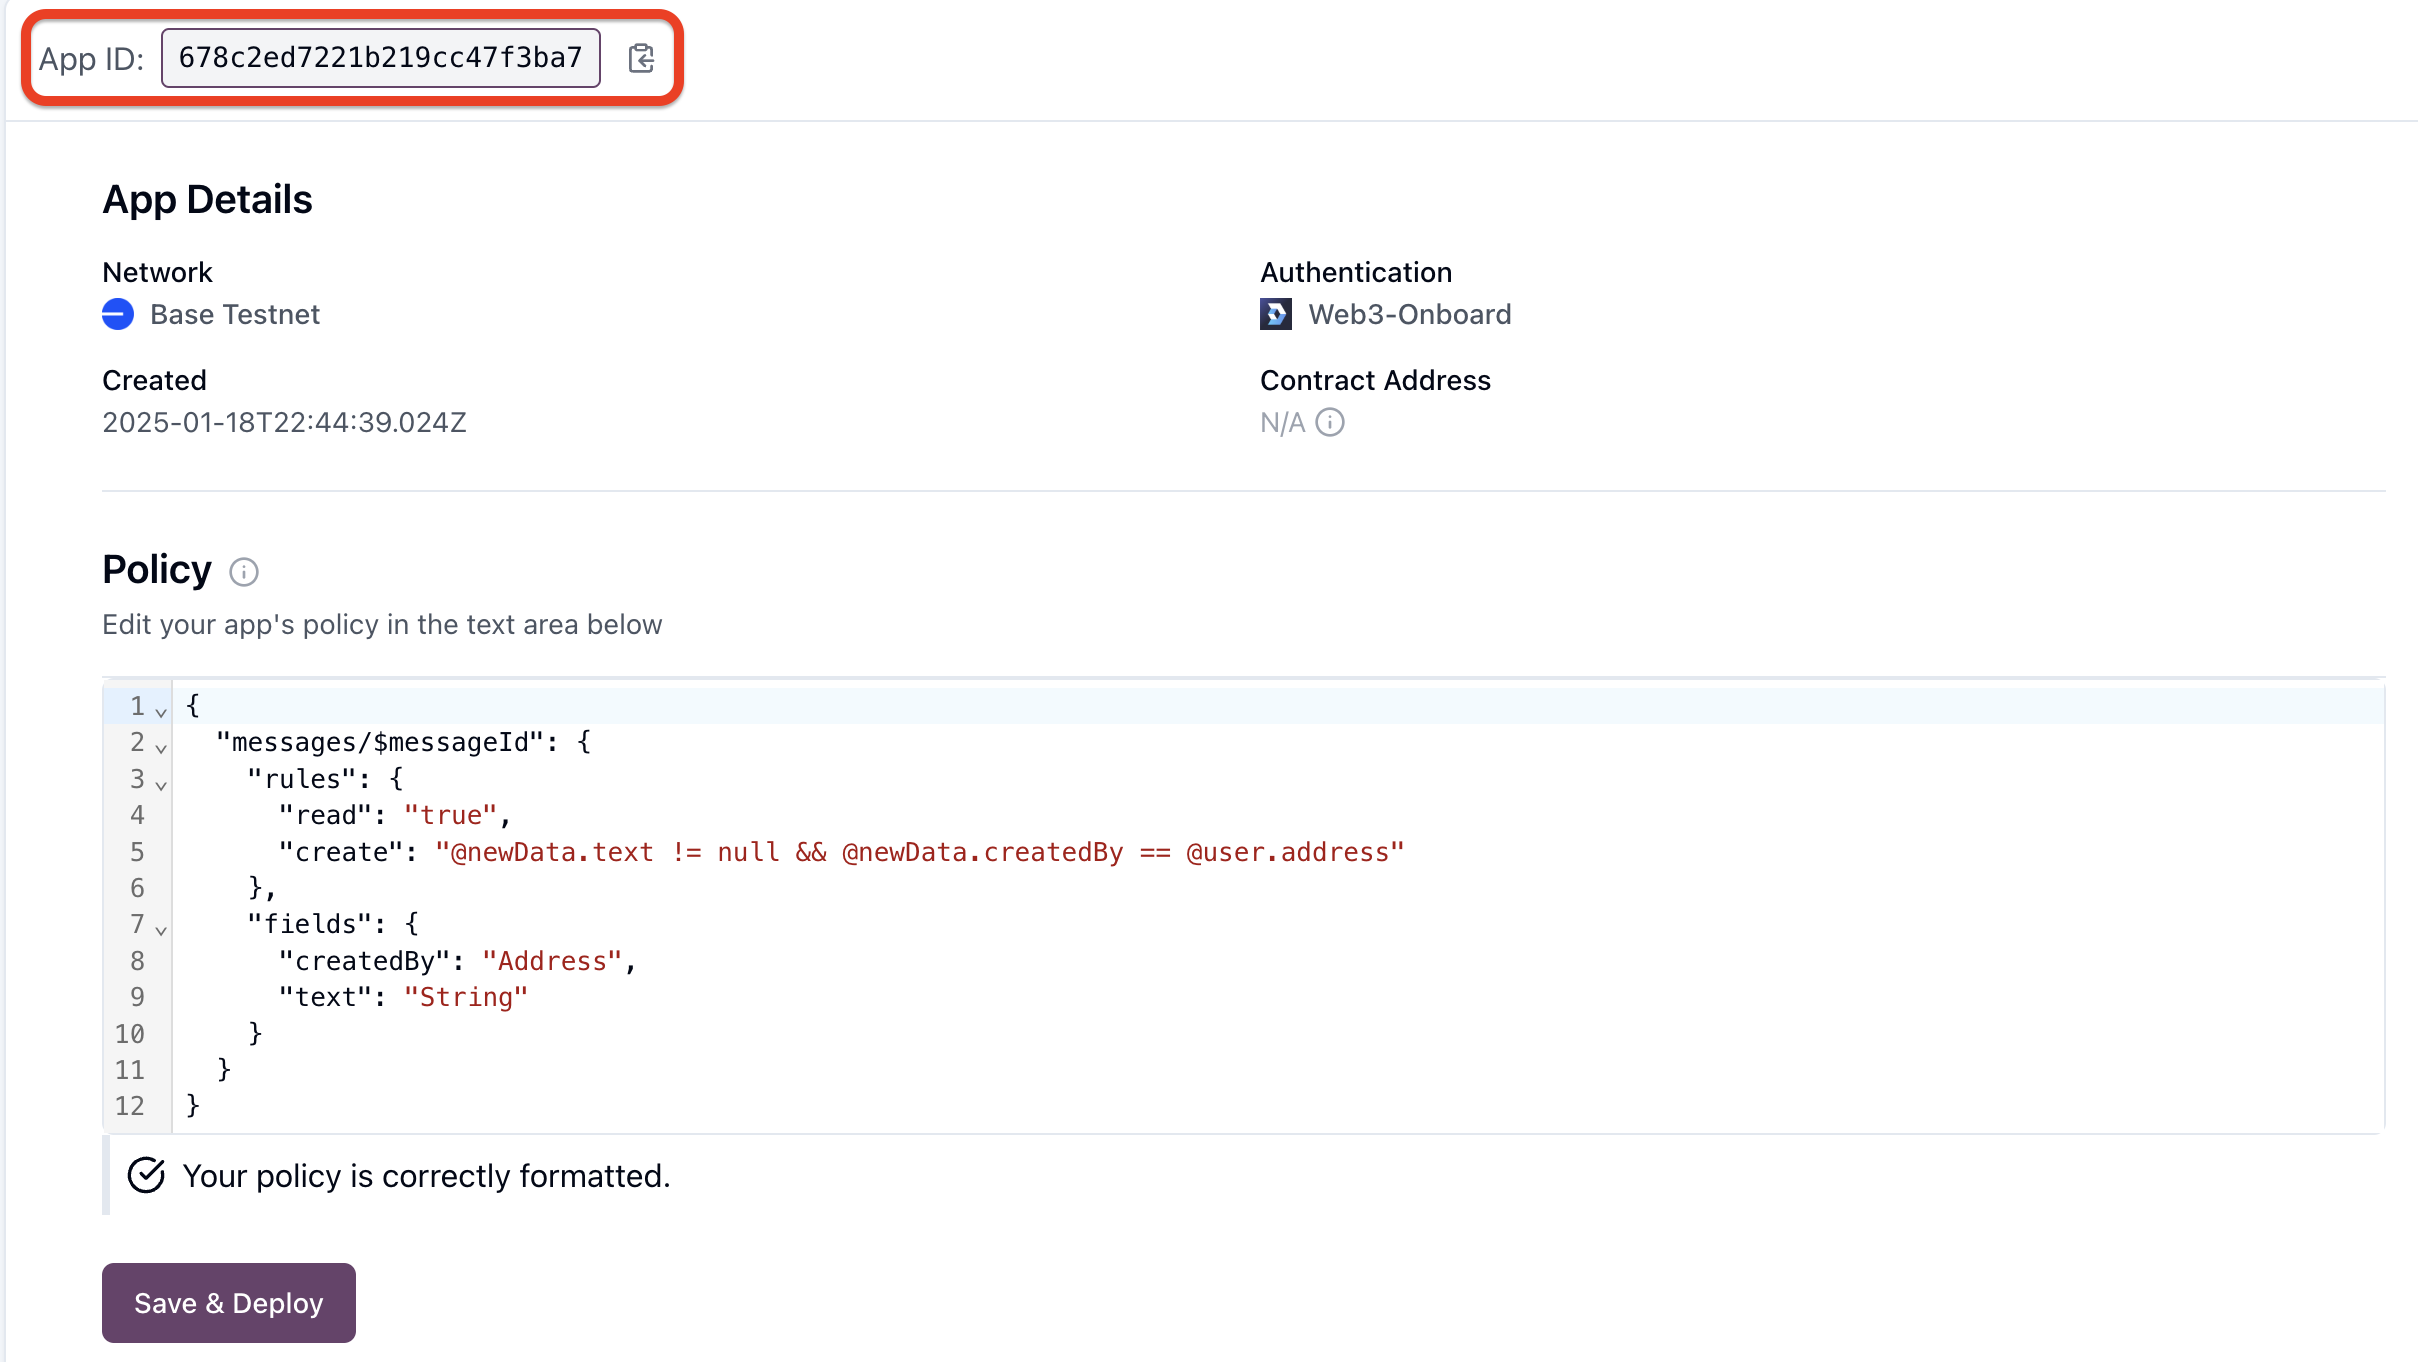
-
Within your new react app, replace the contents of your src/App.jsx file with the code below.
import { useState, useEffect } from 'react';
import { useAuth, subscribe, set, init } from '@tarobase/js-sdk';

const appId = 'INSERT_YOUR_APP_ID_HERE'; // Replace with your appId from the console
init({ appId });

function App() {
  const { loading: loadingUser, user, login } = useAuth();
  const [messages, setMessages] = useState([]);
  const [newMessageText, setNewMessageText] = useState('');
  const [lastTransactionId, setLastTransactionId] = useState(null);
  const [sendingMessage, setSendingMessage] = useState(false);

  useEffect(() => {
    subscribe('messages', {
      prompt: "Get last 10 msgs",
      onData: (data) => setMessages(data.sort((a, b) => b.tarobase_created_at - a.tarobase_created_at)),
      onError: (e) => console.error("Failed to get messages", e.message),
    });
  }, []);

  const handleSendMessage = async (e) => {
    e.preventDefault();
    if (!newMessageText.trim() || (!user && !(await login()))) return;
    setSendingMessage(true);
    try {
      const setResult = await set('messages', { createdBy: user.address, text: newMessageText });
      if (setResult.transactionId) setLastTransactionId(setResult.transactionId);
      setNewMessageText('');
    } catch (error) { console.error("Failed to send message", error); }
    finally { setSendingMessage(false); }
    return false;
  }

  const styles = {
    container: { width: '100vw', display: 'flex', flexDirection: 'column', alignItems: 'center', justifyContent: 'start', height: '100vh', textAlign: 'center', padding: '0 15px', boxSizing: 'border-box' },
    chatBox: { width: '100%', maxWidth: '600px', margin: '20px auto', border: '2px solid #ccc', borderRadius: '8px', backgroundColor: '#f5f5f5', padding: '20px', boxShadow: '0 2px 4px rgba(0,0,0,0.1)' },
    messagesContainer: { height: '400px', overflow: 'auto', display: 'flex', flexDirection: 'column-reverse', backgroundColor: '#fff', padding: '15px', borderRadius: '6px', marginBottom: '15px', minHeight: '400px' },
    message: { padding: '10px', margin: '5px', borderRadius: '5px', backgroundColor: '#f0f0f0', alignSelf: 'flex-start', maxWidth: '80%', width: '100%', position: 'relative', wordBreak: 'break-word' },
    input: { flex: 1, padding: '10px', borderRadius: '4px', border: '1px solid #ccc', fontSize: '16px', backgroundColor: '#fff', color: '#000', minWidth: 0 },
    button: { padding: '10px 20px', borderRadius: '4px', border: '1px solid #ccc', backgroundColor: '#0056b3', color: 'white', cursor: sendingMessage ? 'not-allowed' : 'pointer', fontSize: '16px', position: 'relative', minWidth: '80px' },
    badge: { position: 'absolute', top: '8px', right: '8px', padding: '2px 6px', borderRadius: '12px', fontSize: '10px', fontWeight: 'bold' },
    onchainBadge: { position: 'absolute', top: '8px', right: '8px', padding: '2px 6px', borderRadius: '12px', fontSize: '10px', fontWeight: 'bold', backgroundColor: '#4CAF50', color: 'white' },
    offchainBadge: { position: 'absolute', top: '8px', right: '8px', padding: '2px 6px', borderRadius: '12px', fontSize: '10px', fontWeight: 'bold', backgroundColor: '#FFC107', color: 'black' }
  };

  return (
    <div className="App" style={styles.container}>
      <h1>My Tarobase Chat App</h1>
      {appId === 'INSERT_YOUR_APP_ID_HERE' ?
        <div style={{ maxWidth: '400px', margin: '20px', padding: '20px', backgroundColor: '#f8f9fa', borderRadius: '8px', color: 'red' }}>Please add your Tarobase App ID at the top of App.jsx where it is stated as <code>INSERT_YOUR_APP_ID_HERE</code> and refresh this page</div> :
        loadingUser ? <div>Loading...</div> : user ? (
        <>
          <p>Connected as: {user.address}</p>
          <div style={styles.chatBox}>
            <div style={styles.messagesContainer}>
              {messages.length === 0 ? <div style={{ color: '#666', padding: '20px' }}>No messages yet. Start chatting!</div> :
                messages.map((message, i) => (
                  <div key={i} style={styles.message}>
                    <div style={{ textAlign: 'left' }}>
                      <span style={{ fontWeight: 'bold', fontSize: '12px', color: '#444' }}>{message.createdBy.substring(0, 6)}...{message.createdBy.substring(message.createdBy.length - 4)}:</span>
                      <div style={{ marginTop: '4px', color: '#000' }}>{message.text}</div>
                    </div>
                    <div style={message.tarobase_block_number ? styles.onchainBadge : styles.offchainBadge}>{message.tarobase_block_number ? 'on-chain' : 'off-chain'}</div>
                  </div>
                ))}
            </div>
            <form onSubmit={handleSendMessage} style={{ display: 'flex', gap: '10px', alignItems: 'center' }}>
              <input type="text" value={newMessageText} onChange={(e) => setNewMessageText(e.target.value)} style={styles.input} placeholder="Type your message..." disabled={sendingMessage} />
              <button type="submit" disabled={sendingMessage} style={styles.button}>
                {sendingMessage ? '...' : 'Send'}
              </button>
            </form>
          </div>
          {lastTransactionId && <div><p>Last Transaction ID: <a href={`https://sepolia.basescan.org/tx/${lastTransactionId}`} target="_blank" rel="noopener noreferrer">{lastTransactionId}</a></p></div>}
        </>) : <button onClick={login}>Login</button>}
    </div>
  );
}

export default App;
- On line 4 which looks like
const appId = 'INSERT_YOUR_APP_ID_HERE';, replace INSERT_YOUR_APP_ID_HERE with your app ID from the Project Details page found in the step 1 on your Tarobase console.
Your front-end is now all setup and it includes:
- Tarobase initialization and wallet login using the init and useAuth Tarobase SDK function and React hook.
- Creation and real-time updates of chatroom messages using the set and subscribe Tarobase SDK function.
Step 4: Test Your Off-Chain Chat
-
Visit http://localhost:5173.
-
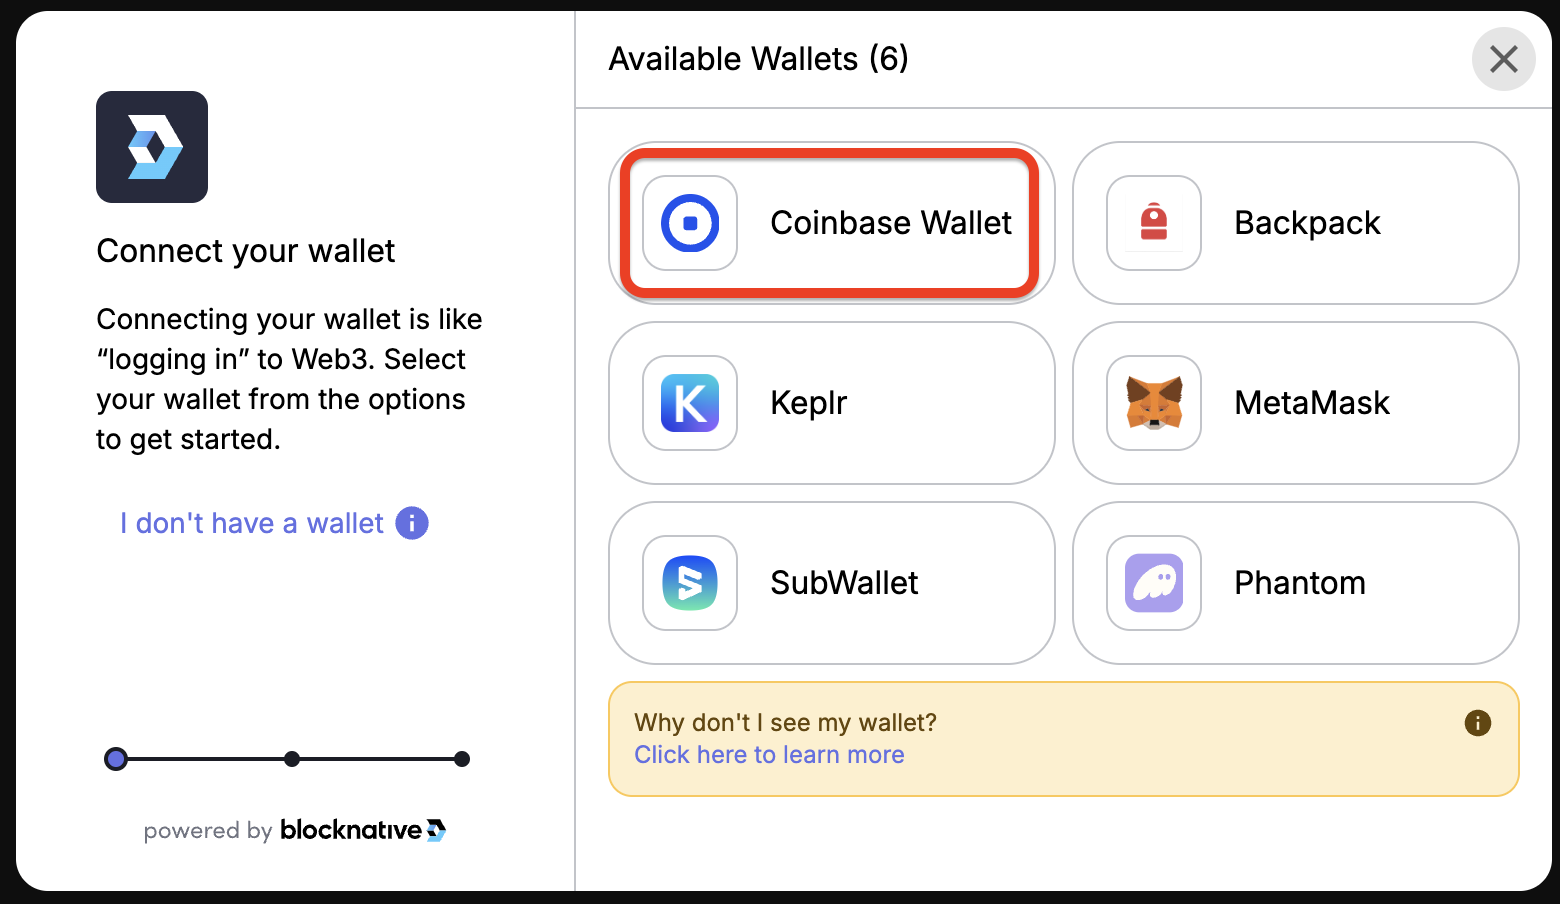
Click Login and select Coinbase Wallet from the wallet options. We recommend using Coinbase Wallet for this guide since it includes a built-in feature that covers transaction fees on Base testnet for you.
-
Your browser may block the Coinbase Wallet pop-up by default - look for a pop-up blocker notification and allow pop-ups from this site. Then authorize the login pop-up.

-
Click "Sign Up" and create a passkey to log in.
-
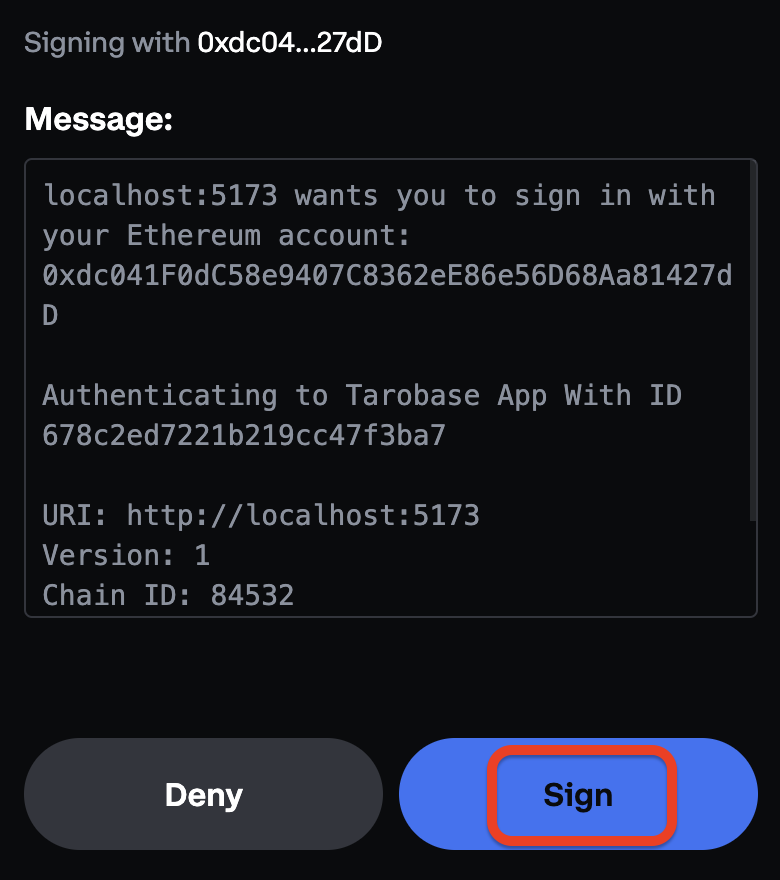
Confirm the signature request to complete your log in.
-
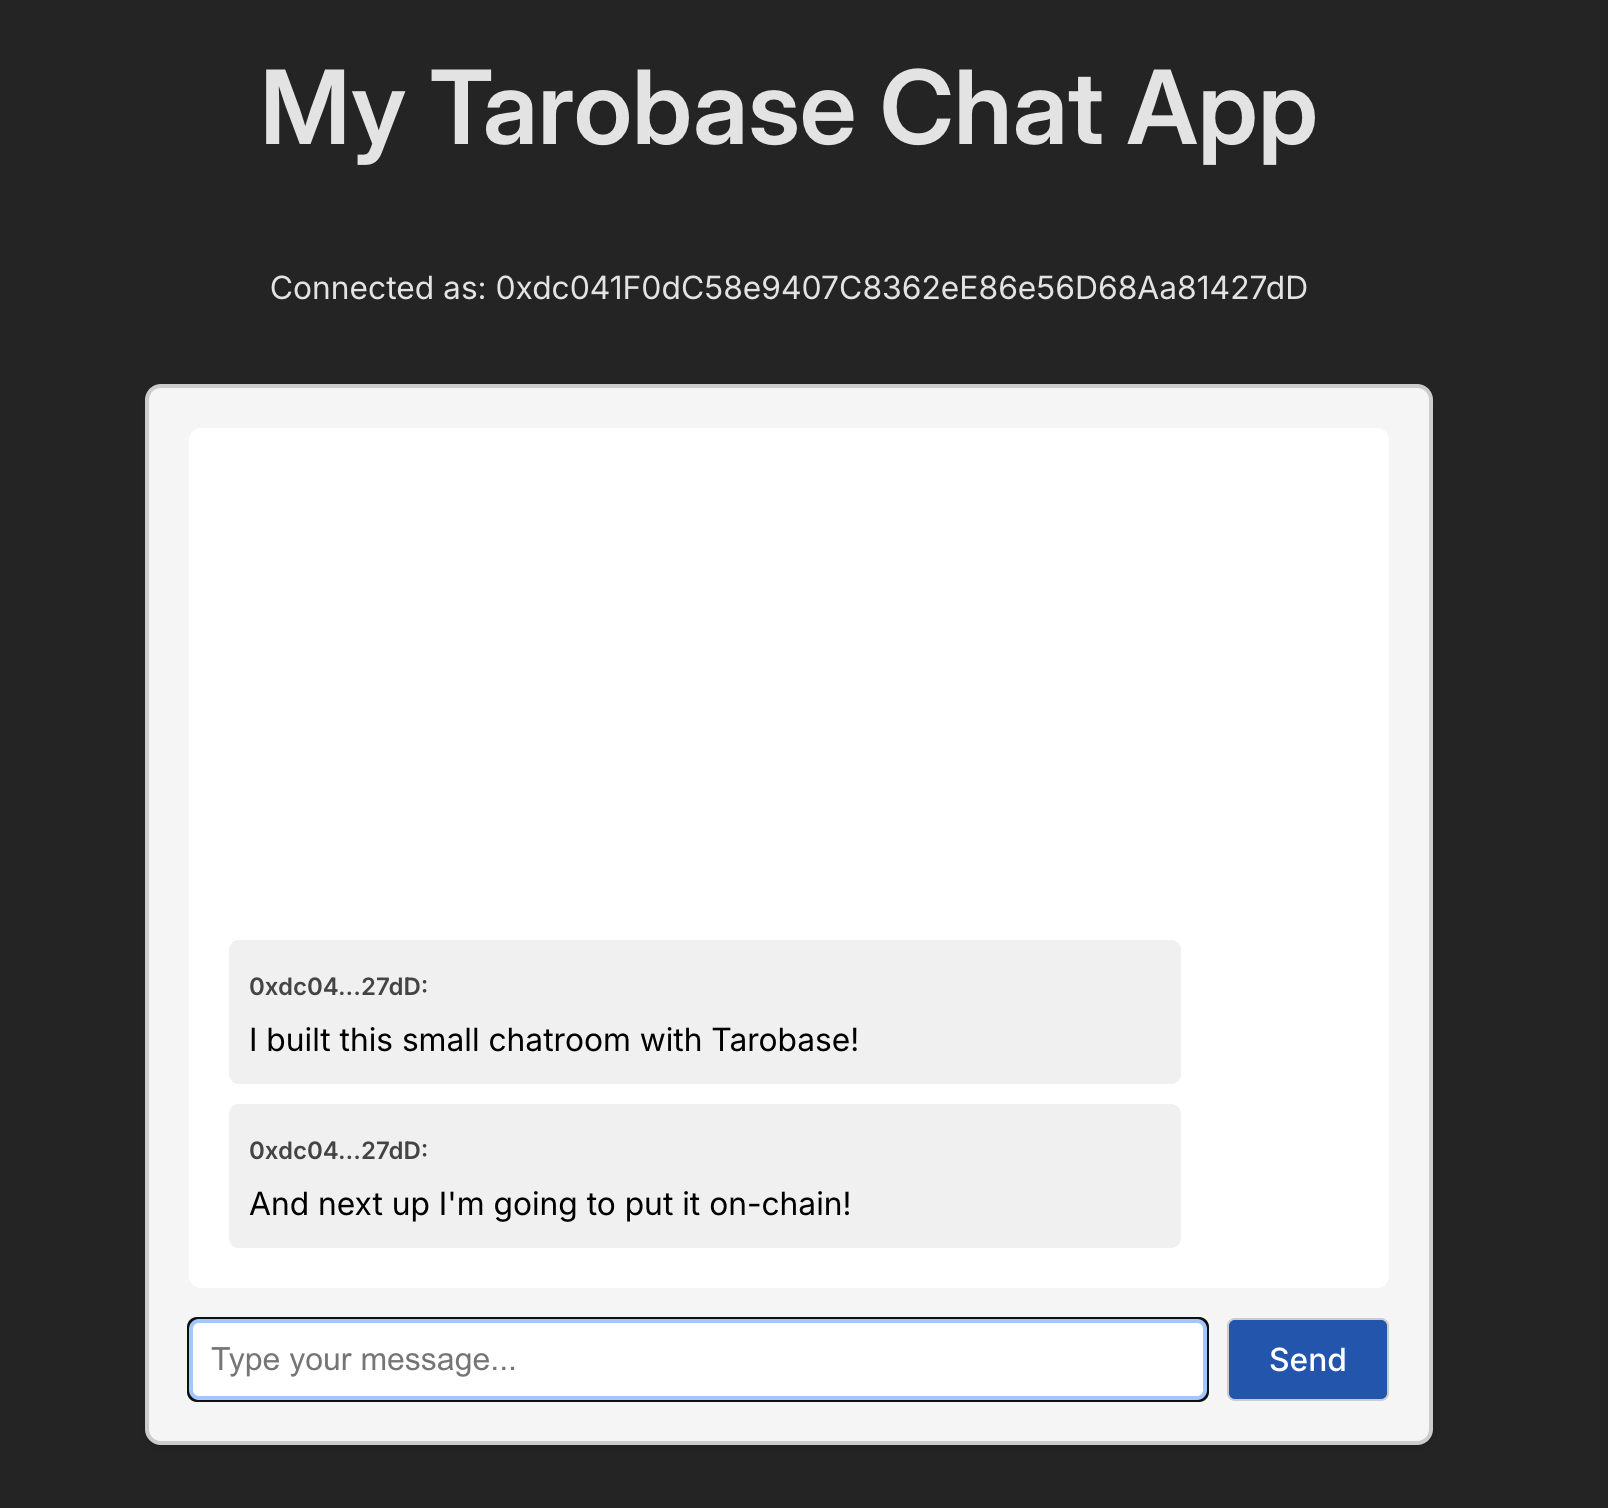
Now try sending a message in the chat after you've logged in. It should appear in the chat window. You can also open up multiple tabs of the same app to see messages are shown in real-time as they are sent.
-
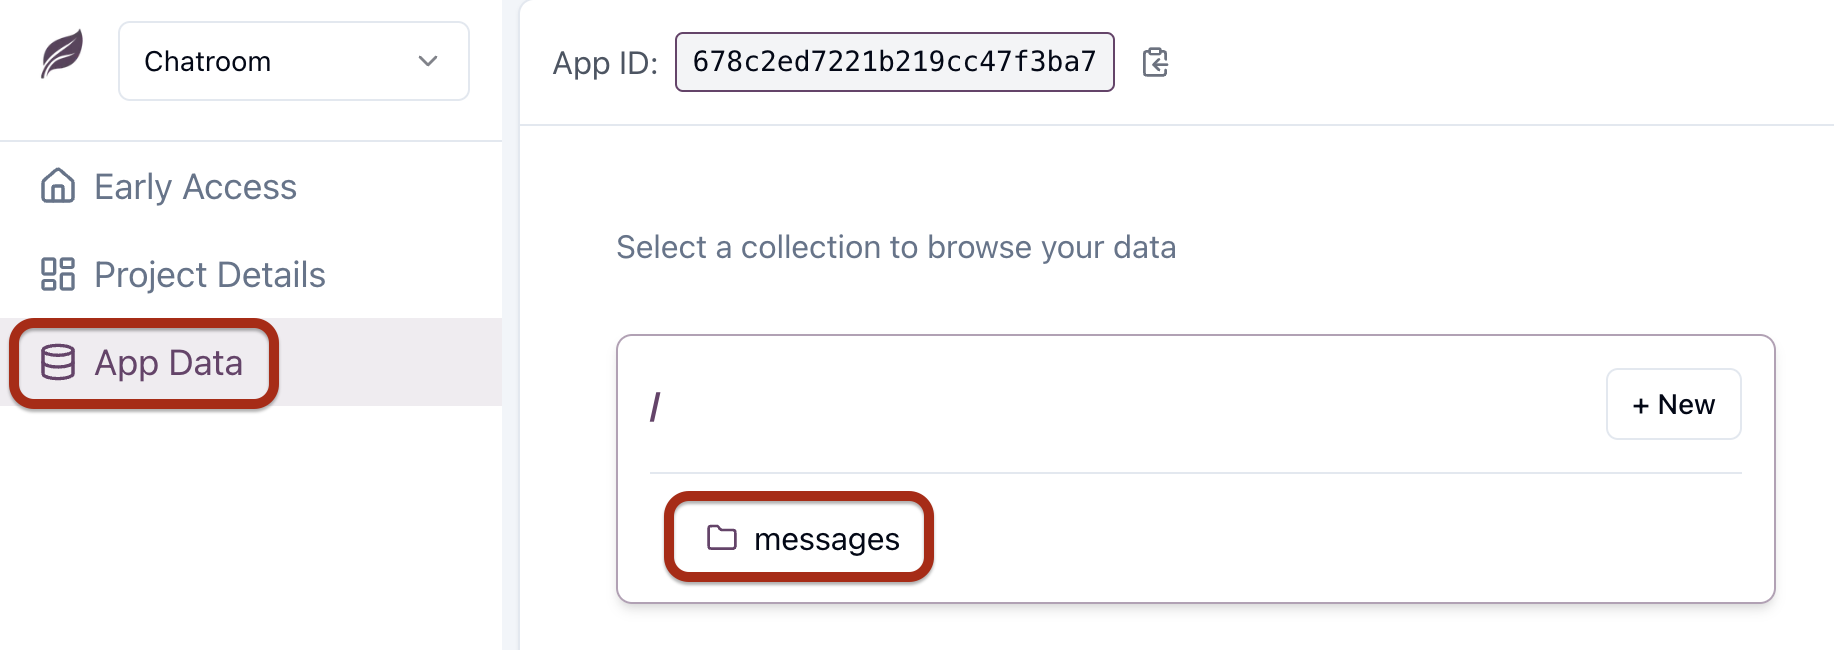
You can view all messages and data in your Tarobase data store through the "App Data" tab in your app's dashboard on the Tarobase Console. This interface lets you browse, edit and manage all of your app's data, whether stored on-chain or off-chain.
🎉 Congratulations! 🎉 You've just built and deployed your first Tarobase application! This is a major milestone - you've created a real-time chat application with Web3 authentication in just a few minutes.
Learn how to enhance your chat app by storing messages on the Base network and implementing a $1 USDC fee per message.